![]()


|
|
||||
|
|
||||
|
|
|
|||
|
Taking Photographs of
Minerals and Gemstones |
||||||||||||||||||||||||||||||||||||||||||||||||||||||||||||||||||||||||||||||||||||||||||
|
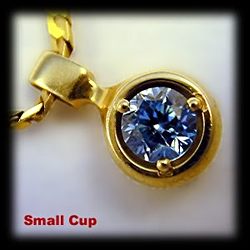
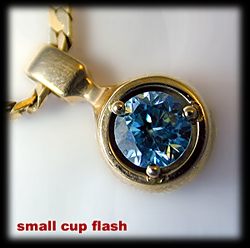
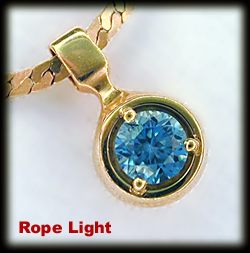
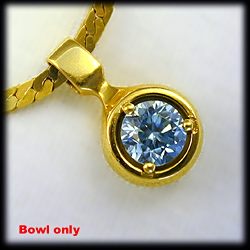
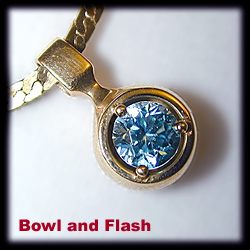
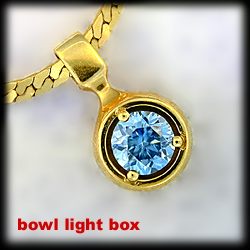
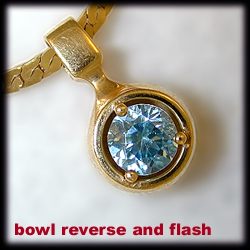
The subject is a 14K yellow gold necklace with blue zircon. The follow shows 8 different lighting schemes deployed as they were described earlier. The lighting method is described on the left of each table, and the key points summarised on the right. |
||||||||||||||||||||||||||||||||||||||||||||||||||||||||||||||||||||||||||||||||||||||||||
|
|
|
|||||||||||||||||||||||||||||||||||||||||||||||||||||||||||||||||||||||||||||||||||||||||
|
|
|
|||||||||||||||||||||||||||||||||||||||||||||||||||||||||||||||||||||||||||||||||||||||||
|
|
|
|||||||||||||||||||||||||||||||||||||||||||||||||||||||||||||||||||||||||||||||||||||||||
|
|
|
|||||||||||||||||||||||||||||||||||||||||||||||||||||||||||||||||||||||||||||||||||||||||
|
|
|
|||||||||||||||||||||||||||||||||||||||||||||||||||||||||||||||||||||||||||||||||||||||||
|
|
|
|||||||||||||||||||||||||||||||||||||||||||||||||||||||||||||||||||||||||||||||||||||||||
|
|
|
|||||||||||||||||||||||||||||||||||||||||||||||||||||||||||||||||||||||||||||||||||||||||
|
|
|
|||||||||||||||||||||||||||||||||||||||||||||||||||||||||||||||||||||||||||||||||||||||||
|
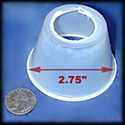
Comments/Conclusions: When shooting photographs of gemstones, or jewelry, color is the most illusive property. If I were preparing materials for a catalog or for sale, then I would spend far more time getting colors accurate and very consistent. When I shoot my gemstones I try and get the color of the gemstone as close to the original as possible and do not worry whether the background is pushed to a different hue. I also tend to over blur the backgrounds because, to me, they have little or no importance other than showcasing the gem. To really produce accurate color you would need to limit all lights that are illuminating the sample to one type of color source. In most of my photos there are 3 or 4 different sources of light that might come into play. The ceiling light (warm florescent), the flash (balanced I assume), the light box (fluorescent), the rope light (warm tungsten), and the halogen microscope lights. Accurate and consistent color for gems and jewelry is properly accomplished in an enclosed light box. The box limits extraneous light from entering while providing a fixed illumination, color temperature, and probably good diffusion. These types of boxes are sold by GIA (Gemological Institute of America) and others. I have tried to show how to get good quality images with minimal effort and expense. I have also stressed the use of Digital Cameras rather than film cameras as they are inexpensive to operate and can be used over and over without the need for film processing. I also want to stress that experimentation is half the fun of shooting most of these photographs. You can easily make diffusers from just about anything, and by using a digital camera and a computer, you can quickly try inventive techniques and modify them as needed without much cost. My bowl diffusers were purchased for $2.50 (set of four!), my rope light cost $5.95 (after Christmas sale), my light box was purchased mail order (WEB) for about $20, the remainder of the things can be purchased from JoAnn Fabric and any reasonably well supplied art store. (felt, cloth, colored paper, acetate, mylar, drafting vellum, etc.) If you are not particularly interested in adapting a camera to a microscope, then there are a number of digital cameras that can be obtained for $200-$400 that have close focus or macro lenses. The lower cost Nikons can all focus to within a 1.6". The model 775 has a street price of about $250 with 2.1 Megapixels and a macro range as close as 1.6". (All images in this photo document were made with cameras of 2.1 Mega pixels or less.) To get information on a wide variety of digital cameras try the "Digital Photography Review" , "DCviews" , or "digital-photography/". Camera
Model Canon
A100 Canon
S200 Canon
S30 Nikon
775 Nikon
885 Nikon
2500 Olympus
510 Olympus
C-700 Olympus
C-2500L Sony
DSC-P9 Sony
DSC-P31 Sony
DSC-P30 Kodak
DX3700 Kodak
DX3900 Kodak
DX3500 Minolta
S304 Minolta
E201 Minolta
2300 Fuji FinePix
2800 Fuji FinePix
2600 Fuji FinePix
F401 I do not sell any cameras, but have compiled a short list to show the range of prices and the macro capability available in today's market place (6/2002). Most of the cameras in this list are well below $500. If you check on the cameras that run from $500 - $999 there are even more available and many focus down to under 1". The prices listed were obtained in June of 2002 and should all continue to fall as time goes on. This is not intended to be a complete list nor will it be updated, it is simply a snap shot in time. The last page of this document is just a gallery of shots using the lighting techniques discussed in this document and some of the Photoshop techniques also explained earlier. ...enjoy and get out there and experiment! |
||||||||||||||||||||||||||||||||||||||||||||||||||||||||||||||||||||||||||||||||||||||||||
|
|
|
|||