![]()


|
|
||||
|
|
||||
|
|
|
|||
|
Taking Photographs of
Minerals and Gemstones |
||
|
|
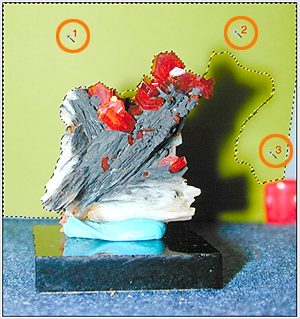
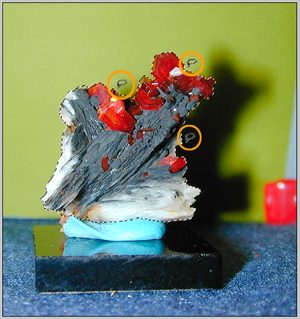
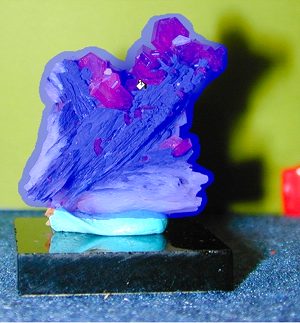
So how do you create those fancy colored backgrounds. The process is easy, but not really fast. The first step is to cut out the mineral from the background, and this can be accomplished in several different ways depending on the version of Photoshop you own or your particular tool set. My favorite method is to use the Magic Wand tool to select portions of the background. I set the tool to a Tolerance value of about 25 or 30. I then begin to click on the background in a open area. Like the (1) shown below left. By holding down the SHIFT-key you can click again and the newly selected area is added to the previous selection. |
|
|
|
|
|
|
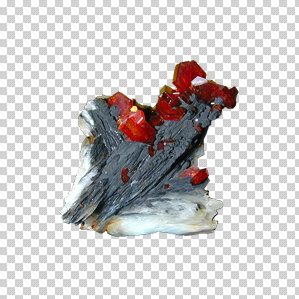
I continue this process until most of the backgrounds is now part of the selection, I then use the INVERSE command from the SELECT MENU. To make the selection the mineral and not the background. Now use the LASSO tool to add or subtract any small places around the edge of the mineral image to create a continuous background. By using the SHIFT-key the lasso tool will add information to the selection, and by using the OPTION-key (ALT on a PC) the lasso tool will subtract from the selection. Once the selection is complete use the COPY command to copy the mineral image and then create a new document and PASTE it into the document. Either make the document larger than the mineral image as it is created or use the CANVAS SIZE command under the IMAGE MENU. The reason you want to PASTE the image is so that it will create a second layer in Photoshop. |
||
|
|
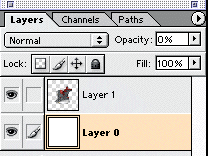
Here you can see that the mineral is in a separate layer in the new document. By selecting the background layer or layer0 depending on how it is named in your version of Photoshop, it is possible to place a new background on this layer. You can try several until you find one you like. |
|
|
|
||
|
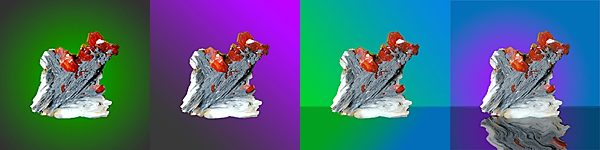
I usually use some version of the GRADIENT Tool to create a dramatic background. Several examples are show in the small photos above. Use your imagination and some of the filters available in Photoshop. The last image used a ripple filter on a reversed image to make it look like a reflection. Another way to separate the mineral from the backgrounds is to use the EXTRACT function in Photoshop 5.5 and higher. In theory you just draw a line around the item you want extracted, then fill in the outline of the item, and finally press the OK button. My experience with the EXTRACT function has been less than stellar. I tend to end up with several areas that are not fully extracted. I recommend that if you use this method, you use a small brush size (6 or less) when outlining the sample. This seems to give better results. If you use the default size (20 pixels) then you will probably have transparent areas in your extraction. The wider brush and fill are shown in the two images below. |
||
|
|
|
|
|
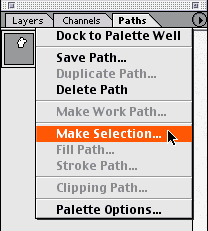
There is another tool which will work to separate the mineral from the background, but I find it very tedious. Use the PEN tool to trace an outline around the mineral, then use the MAKE SELECTION command from the PATHs window to create a path around the selected mineral. The images just below shows the PEN tool being used to draw an outline around a portion of the mineral picture. |
||
|
|
||
|
|
Once the outline is closed with the PEN tool, you use the Make Selection command from the Paths window tab (as seen to the left) to create a selection. Now use the copy command and follow the above instructions to capture the mineral image, and create a background. |
|
|
|
|
|||