![]()


|
|
||||
|
|
||||
|
|
|
|||
|
Taking Photographs of
Minerals and Gemstones |
||||||||||
|
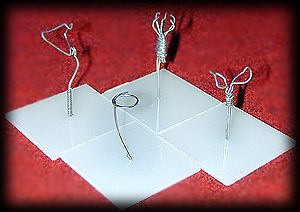
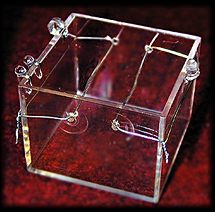
I have made many gemstone holders for photography, mostly out of wire. From simple loops, to prong type settings, and some weird clamps. (See picture below left for a few examples.) It eventually dawned on me that what I wanted was a gemstone floating in space, away from the background, but without lots of wires sticking out all over it that would require later removal in Photoshop. I hit upon the design of two parallel wires stretched across an opening. I took a Perkybox and drilled the lid on opposite sides and stretched two parallel wires through it. (Below right.) The gemstone is placed between the wires and appears to almost float. Next, I decided that instead of wire I should use fishing line, and this would even make the wires disappear. |
||||||||||
|
|
 |
|||||||||
|
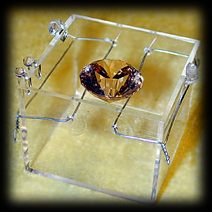
After several more or less unsuccessful attempts with fishing line, it was back to the drawing board. The fishing line kinda works, but the stones tend to tumble through it at the slightest movement of the box. Nylon just doesn't have a high enough coefficient of friction to keep gemstones secure. It also tend to be somewhat more difficult to level the stones on the line, as they must be stretch very tight to provide a stable base for the stone. A second pair of parallel lines at right angles to the first creates a fairly stable square cross section, but it is time consumingto build and fits only a handful of stones. |
 |
|||||||||
|
Recently I took a 2" x 1" piece of artist acetate from an artist store, and cut a hole in the center with an xacto knife, then I bent the two ends down and creased them around a Plexiglas sample holder. I made a series of the acetates with different sized holes and some different shaped holes (circular and rectangular.) I place the stone into a hole with a slightly smaller diameter and let it "float" in the holder. For the most part this allows light to enter the stone from all sides, and looks almost invisible when shooting down at the top. It produces a "floating stone". |
||||||||||
|
|
||||||||||
|
|
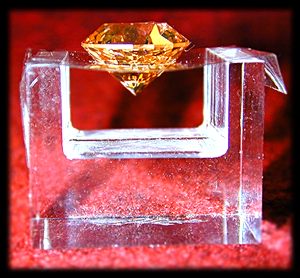
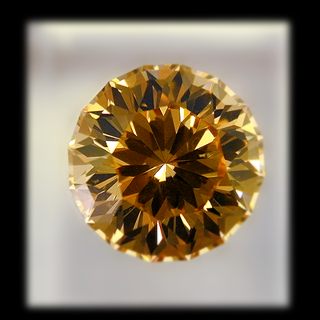
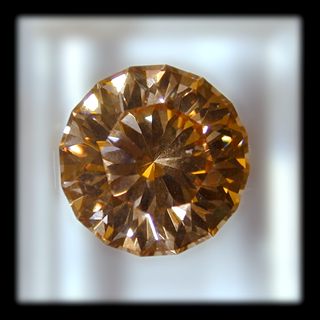
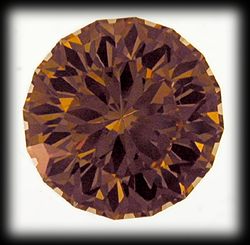
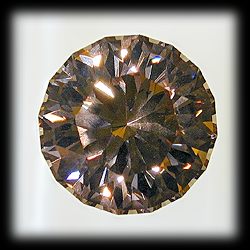
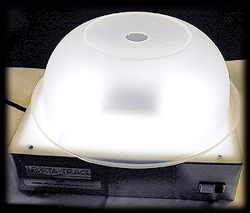
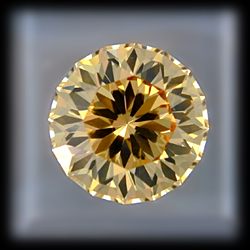
To the left is a CZ in a 7/16" hole. It protrudes a little way into the bottom and rests nicely on the edges of the hole. There is no need to fasten the sides of the acetate as the stone is not heavy enough to cause a collapse. This stone holder was placed on the white cotton sheet and then covered with the "dome" (bowl) described earlier. The two photos below were taken with "bowl-only" light and with the addition of a flash exposure. The "bowl-only" light is to the left, and the flash is on the right. |
|||||||||
|
|
|
|||||||||
|
A colored background can be placed below the plastic holder if desired. The separation of the background from the stone makes it easy to throw the background out of focus and the stone may appear floating. There are some additional treatments that sometimes enhance a gemstone in this set up. |
||||||||||
|
|
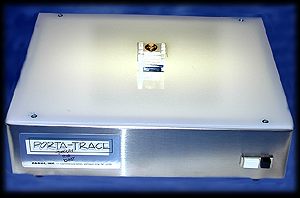
I sometimes use a light box (see picture left) to add rear illumination to the subject. By itself it is not good at enhancing a gemstone image. Look at the two pictures below. The first (below left) looks almost cartoonish as the overall contrast has been greatly reduced with the back lighting. The second although better is still a bit flat. The light box works well in providing even and better luminance than just the outside lights, but too much comes directly through. I cut a 3" square piece of material or use a piece of paper to cover the area right below the sample. |
|||||||||
|
||||||||||
|
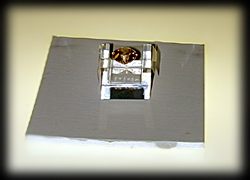
The Pict below left shows a Gary card placed under the gem which blocks the direct light coming through the base. The remainder of the bottom light does a good job illuminating the inside of the bowl and pouring light back on to the gemstone. The set up is shown in the image to the right. The resultant photographs are shown below these two images. The one on the left was taken with only the reflected light. It is obviously a better shot than the one directly above with the transmitted light. Images taken this way tend to still have a cartoon-like look but they show good detail as to the cut of the stone. The image to the right was taken with the same lighting plus the flash. The flash makes for a more realistic looking stone. The flash forces light to enter and return from the top of the stone making it appear more like we might expect from a faceting stone. |
||||||||||
|
||||||||||
|
|
|
|||