|
GIF Transparency |
||
|
|
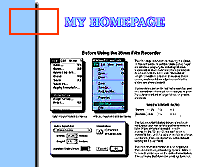
Transparency Let's assume that we have a new Homepage just about ready to place on the active WEB. Our boss sez ..."The only thing missing is our company logo, and I want right where the red box is." We have a copy of the logo that was given to us against a white background. If it (figure A.) is just placed in the area where the red box is, well ... it looks like this (figure B). Probably not what the old man had in mind! Since the GIF format supports transparency, it is possible to select a color and make it transparent. (Question: transparent to what?) It can be made transparent to the background of the WEB page, the selected color will become a clear window, allowing the background to show through. Notice in the logo (figure C) the rose color was selected as transparent, with the result, a window to the gray background through the red portions of the logo. In the second logo (figure D) WHITE was chosen as the transparent color. The white box has generally disappeared around the logo leaving only a few light pixels around th edge of the logo. These may have been created when the image was originally produced, or when it was reduced in size. This points-out a pitfall of creating GIF transparencies, if the original image was created against a different colored background, then the resultant "cutout" (that which is not transparent) will be rimmed with pixels similar in color to the original background. Some of the newer GIF editing programs provide a solution for this, they make it possible to select more than one color for the transparency mode. Since the actually file format does NOT support this, it is usually done by turning all of the user selected "transparent colors" to a single color, and then making it transparent. See figures 1-4 (partial closeups) where various colors were selected and then changed to transparent.
|
|
|
|
||
|
|
||
|
|
||
|
1. original 2. white 3. pale cyan 4. 3 levels of gray |
||
|
|
||
|
|
||
|
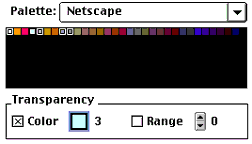
A typical dialog box is shown to the left (figure E), and shows 4 colors selected for transparency. This product is from Digital Frontiers, and is a PhotoShop plug-in "HVS ColorGIF 2.0", and is available in both Macintosh and Windows versions. (Side note: all of the GIF images created in this GIFology were done using this product.) In the end the boss is happy, the final page with the logo (figure F) looks just about as he imagined it. The final logo with several colors being transparent is shown (figure G.) Keep in mind, that this same technique can be used by going into a pixel editing program (like PhotoShop) and painting each of the pixels at the edge of the object to the desires background color. |
||
|
|
||

 B
B  1
1  2
2  3
3  E
E F
F  G
G